

News articles continue to indicate that fast fashion is a significant contributor to climate change. Of course, the first step is buying clothing that will last and taking care of it. However, even if you take good care of your clothes, eventually, seams and hems come undone, sweaters get snagged, and buttons pop off. A recent study by the University of Alberta showed that repairing clothing is essential to increase its usable life and reduce the consumption of new clothing. So, in this post, we’ll discuss how to create and organize a mending kit for your clothes.
Items for Your Mending Kit
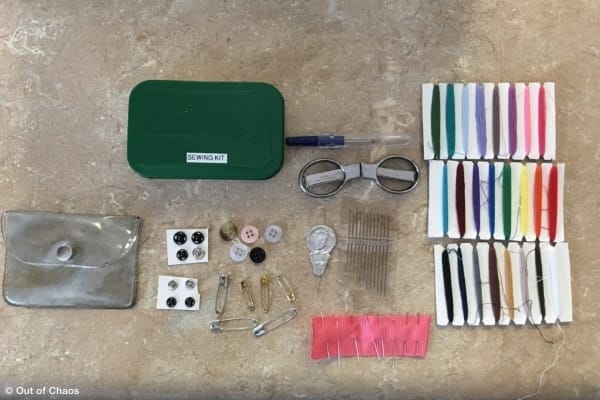
You’ll need these essential items to create a mending kit for your clothes. You may already have these items around your home. If so, gather them together. You can also purchase a pre-made kit. However, the quality of the items might be better if you assemble them individually.
- Good quality scissors: Use these only on fabric. Typically, I avoid telling people to use a tool for only one task, but if you use fabric shears to cut paper (or anything else), they will quickly become dull. And if you’re left-handed, please buy left-handed scissors.
- Thread Snips: It is easier to use these to cut small bits of thread and remove tags from clothing than using large scissors. And they’re a great addition to a travel mending kit.
- Pins: Choose pins with metal or glass heads. Plastic-head pins will melt into your clothing if you iron over them. Tip: Stick a magnet to the bottom of your pin container to help keep the pins inside.
- Needles: A variety pack of round and pointed tip needles is a good choice because you’ll need round tips for repairing knitted fabric and sharp tips for weaves and denim.
- Seam Ripper: This allows you to slice stitching and not the fabric. A small one is great for a travel mending kit, but ones with larger handles are easier to use, especially if you have dexterity issues.
- Tape measure: Choose a flexible, non-stretching with metric and imperial measurements.
- Seam Gauge: This handy gadget is a small ruler with a guide that helps you accurately measure and pin hems to a consistent length. No more crooked skirts!
- Safety Pins: Choose a variety of sizes. Small ones can hold bits of fabric together. Use large ones to feed elastic or string through your hoodie or track pants.
- Thread: Choose good quality threads. The inexpensive kind shreds, knots and breaks easily. You can buy a variety pack or visit a sewing shop and choose colours that match most of your clothing. It would be best to include neutral colours; black, white, grey, beige, and brown. And a friend told me that “army green” thread blends in with almost any colour – browns, blacks, greens, blues, and purples. (I guess there is a reason it’s also called camouflage!)
- Iron and ironing mat: Ironing your clothing before and during mending will help you get good results. If you don’t have space for an ironing board, invest in a special mat to protect your furniture. It’s a good idea to use a press cloth too. It’s a white or unbleached piece of cotton or linen. You can use a recycled tea towel or piece of sheeting (thoroughly washed).
- Fusible interfacing: This type of fabric has hot-melt glue on one side. Ironing it onto your clothing will make the fabric more stable when you sew it. Also, you can iron it onto the inside of a repaired area to make it smooth. Ideally, visit a fabric store and buy a quarter metre of black and white medium-weight interfacing. Cut a few squares to add to a travel mending kit.
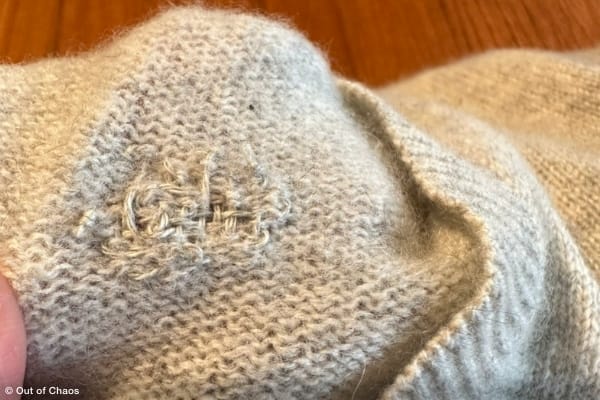
- Knit Repair Kit: A small hook to fix snags and loops in knitted fabrics like sweaters and a shaver that removes lint, fuzz, and little balls from knitted fabrics.
- Lighter: An inexpensive lighter can melt synthetics such as the ends of belts, shoelaces, straps, or handles, so they don’t fray. This video explains how.
- Clear nail polish: Paint a dot of nail polish on knots of thread, button stitching, or the ends of wool to stop them from unravelling or coming undone. And you can use it to stop a run in your stockings too.
- Magnifying Eyeglasses: They help you see detailed work and leave your hands free to do it.
Organizing Your Mending Kit
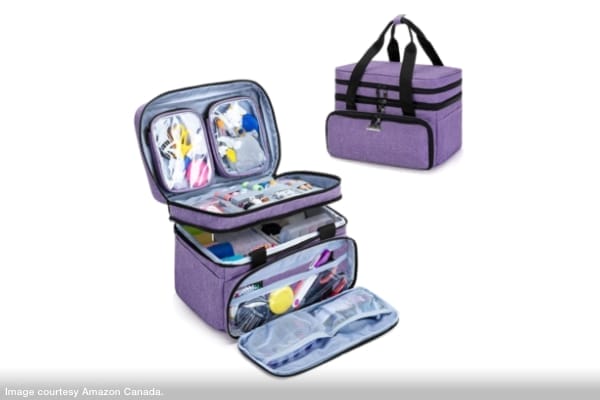
There are many organizing solutions for a mending kit. For example, a transparent plastic shoebox might be enough. Other people might feel nostalgic and use a pull-out wood caddy with a tapestry top that reminds them of their grandmother. Personally, I think this double-layer accessory bag would be useful because it has two small removable pouches you could use for travelling. However, since we’re talking about sustainability, the best idea is to reuse a container you already have.
Organizing the Extra Buttons on Clothing
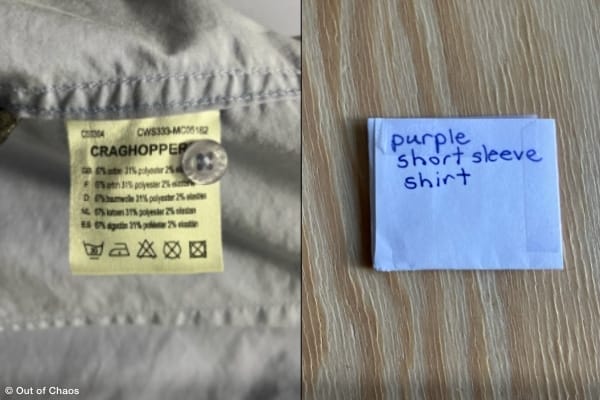
Clothing manufacturers often attach replacement buttons to the tag. Ideally, remove the extra buttons from the clothing. Then, wrap them in a small piece of paper (I used the corner of a used envelope) and label it with the description of the clothing item. Store the extra button envelopes in a small box with your mending kit. And remember, when you travel, you can quickly look through your button container and take the extra buttons for the clothes you’re taking on your trip.
Preparing a Travel Kit
You’ll need your thread snips, a small seam ripper, some squares of interfacing, a few pins and needles, and thread of various colours. Pierce the pins and needles through a small piece of felt or denim to keep them in order. Take a piece of cardboard and make a few notches on the sides. Then wrap the thread around the cardboard. Include a few plain buttons in your travel kit, too.
Using Your Mending Kit
If you’re lucky enough to have a sewing expert in the family, ask for some one-on-one instruction so you can learn to do the repairs yourself. You can also visit a Repair Café, MakerLabs, or take a sewing course through a community centre. Fabric, craft, or hobby stores might also offer sewing courses. And remember, you can also use your mending kit to repair household goods like pillowcases, sheets, blankets, towels, and more!
Finally, collect all the items that need repairs in one place. Then, schedule a tiny task day or a few hours in your planner to do your mending while listening to your favourite music or podcasts. Alternatively, invite some friends over. You can help each other and enjoy some socializing. Maybe our grandmothers had the right idea when they hosted quilting bees!
For more organizing tips and advice, check out our blog archives. For hands-on help, contact the Out of Chaos team.